
- Home
- Services
- Technical Services
- Embroidery Digitizing








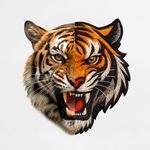

Turn your logo into an embroidery file
Technical digitising for embroidery machines
Embroidery Digitising is a technical service that converts logos, images or designs into a file prepared for embroidery systems. This process is not simply traditional graphic vectorisation: the artwork is prepared with stitches, paths, directions, densities and execution sequences so that the embroidery machine can reproduce the design on the textile support.
- Professional digitising of logos, designs and images for embroidery
- Technical conversion of the file for embroidery machine reading
- Definition of stitches, directions, densities and embroidery sequence
- Suitable for t-shirts, polo shirts, sweatshirts, caps and other textiles
Embroidery Digitizing (Technical Services)
Share
How would you like to create your design?
In the next step, choose how you would like to handle your design.
To keep your estimated delivery date, complete your order by .
Designs
What is embroidery digitising?
Embroidery digitising is the process of converting a logo, image, design or graphic artwork into a technical file prepared to be interpreted by embroidery machines. Unlike a standard JPG, PNG or PDF image, or even a vector file of a logo or design, the final file contains specific instructions about stitches, paths, directions, densities, execution sequence and thread colours, allowing the design to be reproduced on a textile support.
More than graphic vectorisation
Preparation for embroidery is different from conventional graphic vectorisation. In a standard vector file, the goal is to create editable shapes, lines and outlines for printing or digital use. In embroidery digitising, each area of the design has to be converted into stitches and paths that the machine will execute. In simple terms, between each stitch executed by the machine there is a technical instruction that must be defined in the final file so that the embroidery is built correctly.
Professional preparation for cleaner embroidery
A good embroidery result does not depend only on the visual quality of the original logo. The design must be adapted to the final size, garment type, textile support, line thickness, level of detail and the specific limitations of embroidery. Professional digitising helps improve logo readability, stitch organisation and reproduction of graphic elements, reducing issues such as loss of detail, distortion, excessive stitch density or poor legibility.
Suitable for logos, designs and images
This service is suitable for companies, brands, associations, clubs, teams, events and customers who need to prepare a file for embroidery on t-shirts, polo shirts, sweatshirts, caps, jackets, uniforms, patches or other textile items. You can send your logo, image or reference design and Ask-to-Print will handle the technical preparation required so that the file can be used in embroidery systems.
Request digitising of your logo for embroidery
If you need to prepare a logo, design or image for embroidery, choose Ask-to-Print’s Embroidery Digitising service. Send the original file, indicate the intended application and receive a technical version prepared for embroidery systems. A practical solution for turning your graphic artwork into a file suitable for textile customisation.
FAQs
Printing and Production
When preparing a file for printing, it's essential to understand the difference between the two main colour models used in graphic design: CMYK and RGB. Although both allow for attractive visuals, they serve different purposes and produce different results — especially in print processes.
What are CMYK and RGB colours, and which should I use for printing?
CMYK – The colour model for printing
CMYK stands for Cyan, Magenta, Yellow, and Black. It is the colour model used in all professional printing processes. Colours are created by overlaying percentages of these four inks in layers on the printed surface.
- Used in offset and digital printing.
- Based on subtractive colour from reflected light — unlike screen-emitted light.
- Reproduces a more limited colour gamut, but one suited to the physical printing process.
RGB – Colour model for screens
RGB stands for Red, Green, and Blue. It’s a light-emitting colour model used for displaying colours on digital screens such as monitors, tablets, or smartphones. This model can produce much more vibrant and saturated colours than CMYK.
- Ideal for digital images, videos, and websites.
- Offers a wider colour gamut — meaning it covers more possible colours.
- Colours may appear more intense on screen than what can be printed.
What is colour gamut?
The gamut is the range of colours that a given colour model or device can reproduce. The RGB model has a wider gamut than CMYK, meaning it can display colours that simply cannot be printed with standard inks.
When a file created in RGB is automatically converted to CMYK, colours outside the CMYK gamut are adjusted to approximate values. This can result in noticeable visual differences between what is seen on screen and what gets printed — especially with certain RGB-exclusive or highly vibrant tones.
Which should I use when preparing files for print?
You should always work in CMYK colour mode when creating files intended for print. This ensures that what you see during design stays closer to what can realistically be printed.
If you're using design programs such as Adobe Illustrator, InDesign, or Photoshop, set the colour space to CMYK from the start. On Canva, choose CMYK export (available on the Pro version). This practice prevents colour fidelity loss.
On the Ask-to-Print Online Editor, there’s no need to worry: all files are automatically generated in CMYK with optimised colour management.
Useful tip for professionals and beginners
Even when working in CMYK, differences between screen and print may persist. We recommend using a physical CMYK colour guide to visualise true tonal values before finalising your design. This is especially helpful for branding or colour-critical materials.
Ready to create your product design?
To get started, select the product size, review the design instructions, download them for reference and continue to the customisation options.


